Getting started
Getting Started with Winamp
Watch the legacy video on YouTube
On this page 6 sections
Before you begin. Screenshots show earlier versions of Winamp and the SHOUTcast DSP plugin.
Watch the legacy video on YouTube
1. Install Winamp.
For this tutorial, we are going to use Winamp. You can download Winamp from the Winamp official download page.
Please note that while Winamp has a Mac OSX version, the required plugin does not. Winamp cannot be used to steam from OSX. For an alternative, please consider Nicecast.
2. Install the SHOUTcast DSP Plugin.
Now download and install (using the default settings) the SHOUTcast DSP Plugin. You can download this plugin SHOUTcast official DSP page.
3. Enable the SHOUTcast DSP Plugin.
-
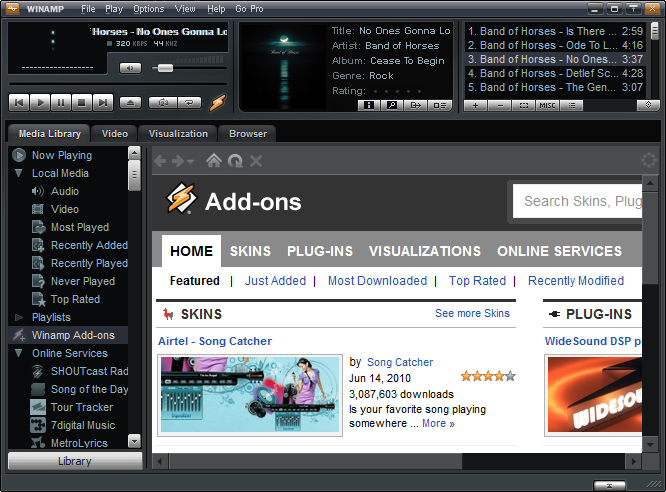
Launch Winamp.
-
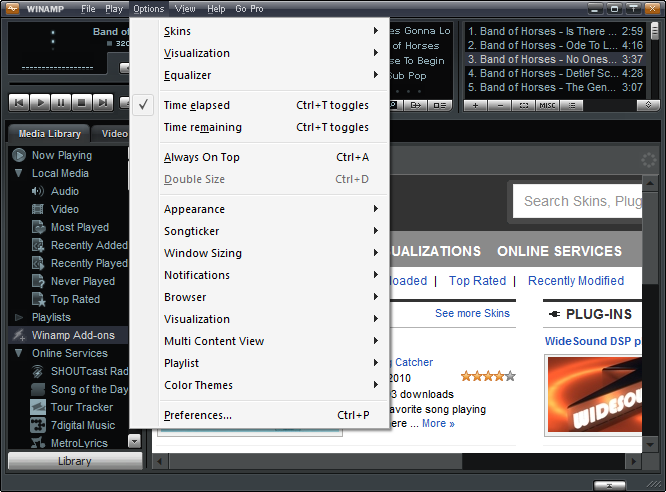
Open "Preferences" (Options -> Preferences, or CTRL+P).
-
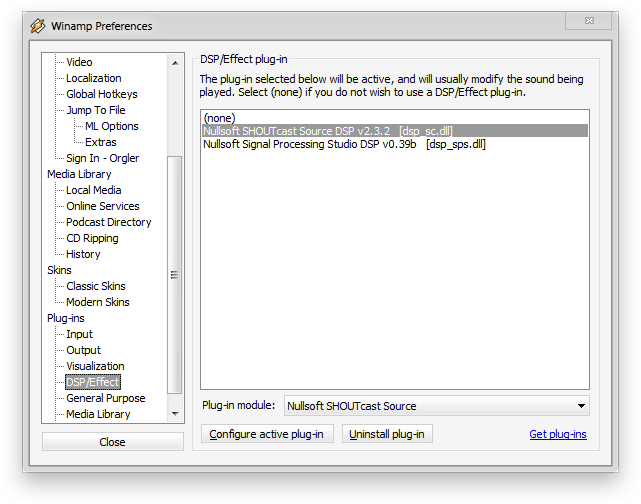
In the left menu, select "DSP/Effect". Then click (In the box on the right) "Nullsoft SHOUTcast Source DSP v2.3.3 [dsp_sc.dll]". Please note that the version shown will change as newer versions are released.
-
Close the Preferences window (Press "Close")
-
You should now have the Nullsoft SHOUTcast Source window running alongside Winamp. This will now automatically run every time you start Winamp.
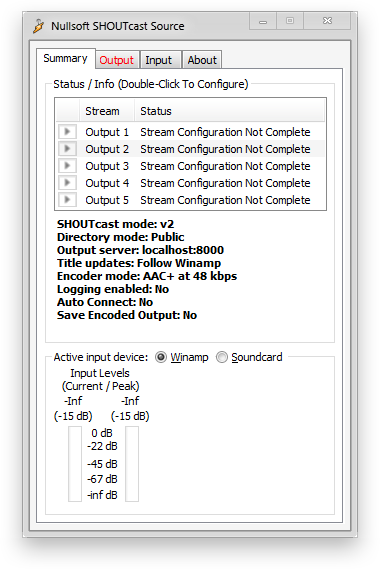
4. Configure SHOUTcast Source (The SHOUTcast Source Plugin).
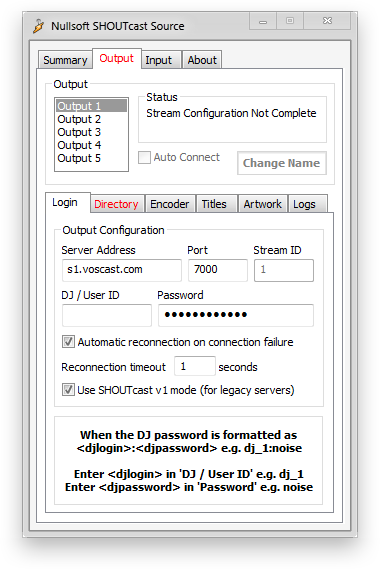
The first settings you will need to modify are the connection settings.
-
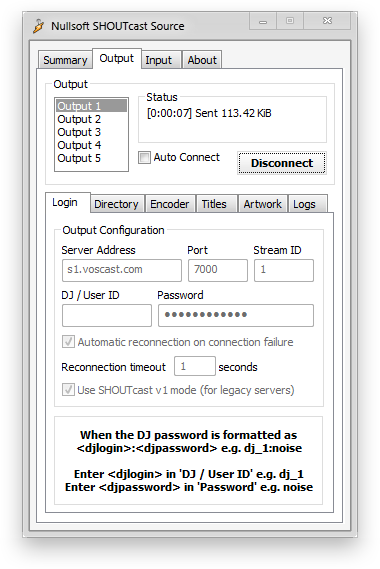
Select "Output" and then "Login".
-
Copy the host and Broadcast password from Overview → Live broadcasting in your account. Use the base port shown as Standard port or Server port (SHOUTcast). Do not add one.
-
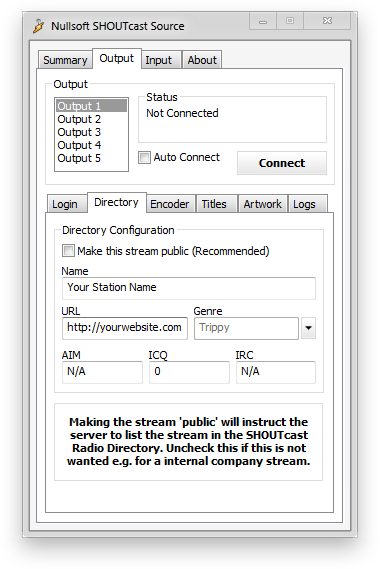
Select Directory and enter your station's name and genre. Optional contact fields can be left at N/A or 0. Make this stream public is a directory request, not a promise of a listing. VosCast Server does not use the old SHOUTcast directory process. See our directory guide.
-
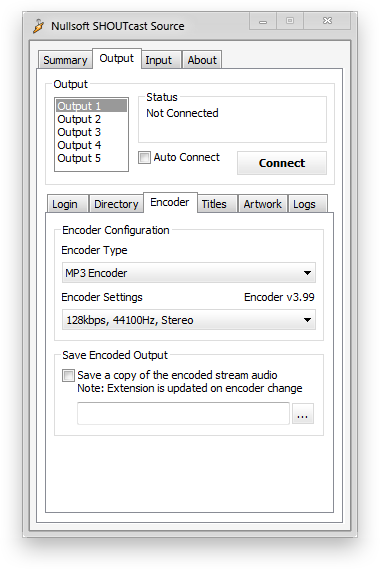
Select "Encoder", and select "MP3 Encoder" as the Encoder Type. For the Encoder Settings, match it to the plan you purchased with your VosCast account (the bitrate).
5. How to DJ.
-
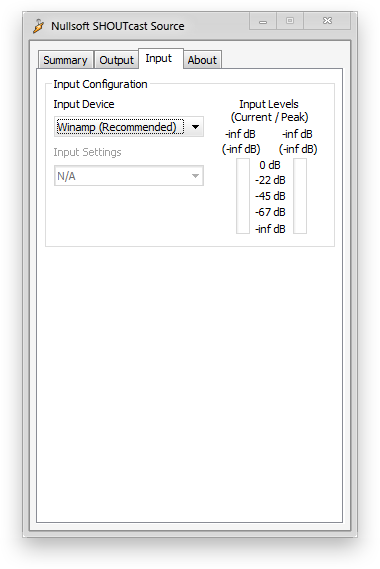
Select "Input".
-
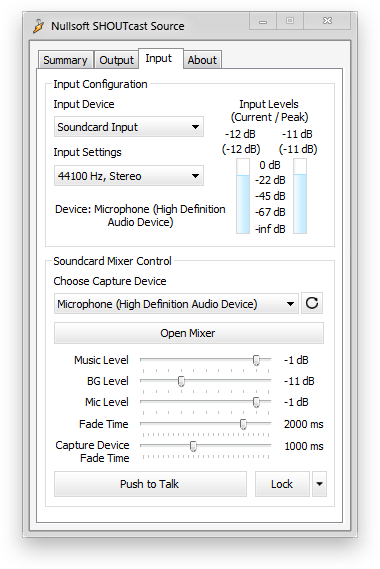
On this tab, you can select "Winamp (Recommended)" or "Soundcard Input" under the Input Device.
Having "Winamp (Recommended)" selected will stream the music you are presently playing in Winamp. Having "Soundcard Input" selected will stream audio from your microphone, or the input device you select.
-
For streaming from your microphone, select "Soundcard Input". You should match the "Input Settings", to match the "Encoder Settings" you set earlier under the Output -> Encoder tab.
-
For broadcasting, to play music, switch the input device to "Winamp (Recommended)". When you want to talk, select "Soundcard Input". Switch the Input Device back to "Winamp (Recommended)" for the moment.
6. Start Broadcasting.
To connect, select "Output", and press the "Connect" button. You should now be streaming the music you presently have playing in Winamp.